


You have the machine, you have the wall, and you have a client waiting for something spectacular. Now the question is how to get from an idea on screen to a finished mural that looks exactly like the original design file. Traditional muralists spend days on what your wall printer finishes before lunch. Whether you’re a startup exploring the possibilities of wall printing or a business owner adding this service to an existing portfolio, the practical side of operating a wall printer matters more than any spec sheet.
This guide covers everything from proper setup and digital file preparation to ink maintenance, print settings, and troubleshooting. By the end, you’ll have the confidence to deliver professional-grade results from your very first project.
Get Printing in Minutes: Printer Setup and Wall Preparation
Every print starts with proper printer setup and choosing the right location. The wall printer moves on wheels along the floor. For uneven surfaces you can add optional rails for extra stability. Either way, make sure the path is level and parallel to the wall. Even a slight tilt affects the final print, so take an extra minute to check. The device comes with a colour LCD control panel where you configure the print area dimensions and adjust the arm height. Maximum height reaches 375 cm, and you can extend the arm in 10 cm increments using the included 50 cm and 100 cm extensions.
Wall preparation is simpler than most people expect. Most painted interior walls need only a clean, dry surface free of loose dust or flaking paint. Porous materials like brick or concrete benefit from a sealing primer to ensure adhesion and colour accuracy. Smooth non-porous surfaces such as glass, metal, or polished tiles require an adhesion promoter for the best long-term results. On darker surfaces the printer applies a white base layer (the W channel in the CMYKW ink set) before the main graphic, ensuring vivid colours regardless of the background. Setup for an experienced operator, including calibration and a test strip, takes minutes, not hours.
From Digital Files to Wall Art: The Printing Process
The wall printing machine accepts standard image formats: PNG, JPG, and PDF. Upload your design file to the control software installed on the connected computer, scale the image to match the wall dimensions, and set the resolution. Wall printing technology based on the Epson F1080 printhead supports output fine enough for photographic detail, so high-resolution source files always produce the sharpest results. The same device functions as a 3D wall printer when you apply multiple ink layers to create raised, textured effects.
Once you confirm the settings and press start, the device does the rest. The printhead moves vertically and horizontally, applying designs directly onto the wall with precision. Two built-in UV LED lamps cure ink droplets the instant they land, making the print touch-resistant immediately. No drying time, no risk of smudging. A full square metre of solid coverage takes around 20 to 50 minutes depending on quality settings. Simpler graphics with open areas print faster because the machine skips empty zones automatically. For a standard 3 by 3 metre wall, expect roughly 2 to 3 hours of printing time.
One detail that separates good results from great ones: adjusting the printhead distance to match the surface texture. Smooth plaster allows the head to sit closer, producing sharper lines. Rough brick requires a slightly wider gap so the head clears every contour without contact. The control software lets you fine-tune this parameter before each job.
Keep Every Print Sharp: Ink Maintenance and Printhead Care
UV ink is the foundation of every wall print. It cures under ultraviolet light rather than air-drying, which means it bonds to virtually any surface and resists fading for up to eight years indoors. The UV wall printer uses a CMYKW ink set: cyan, magenta, yellow, black, and white. Some wall printer manufacturers also offer water-based ink types for specific indoor applications, but UV remains the standard for durability and surface compatibility. Ink consumption depends on coverage and colour density, but the control software calculates exact usage before each job, so you can price projects accurately.
The Epson F1080 printhead requires consistent ink maintenance to stay in top condition. Run the semi-automatic cleaning cycle after each job, or at minimum every 48 to 60 hours during idle periods. This prevents ink from drying inside the nozzles and keeps ink flow steady. If you notice streaks or missing lines in a test strip, a manual cleaning cycle usually resolves the issue. Replacement printheads and all consumable parts ship within 24 hours from the warehouse in Poland.
Store ink at room temperature away from direct sunlight. A low-tank alarm on the control panel warns you before any colour runs out mid-job. Keep a spare set of ink on hand, especially if you run multiple projects per week.
Printing Speed and Quality: How to Get the Best Results
Printing speed and quality depend on three main variables: resolution, surface type, and whether a white base layer is needed. At maximum resolution on a smooth wall without a base layer, expect around 20 to 50 minutes per square metre. Adding the white undercoat roughly doubles the time. On rough surfaces like exposed brick, the printer moves slightly slower to accommodate the uneven texture.
To maximise print quality, start with the highest resolution source image available. The inkjet technology in the F1080 reproduces colour gradients and fine detail faithfully when given enough pixel data. If the source file is too small, the software will scale it up, but the result loses sharpness. For wall murals covering large areas, composites stitched from multiple high-resolution photographs often produce the best outcome.
Clean the wall surface thoroughly and let it dry completely before every job. Run a test strip to check colour accuracy and nozzle alignment before the main print. Match the printhead gap to the surface texture: closer for smooth walls, wider for brick or rough plaster. Use the highest resolution source files available relative to the final print size. Schedule a cleaning cycle after each job or at minimum every 48 to 60 hours. Check ink levels before starting and keep spare supplies available.
Solve Problems Fast: Troubleshooting Common Wall Printer Issues
Most problems come down to three causes: clogged nozzles, incorrect head distance, or a surface that wasn’t properly cleaned. If horizontal lines or colour gaps appear in the output, run the cleaning cycle and reprint the test strip. Persistent streaking usually means a nozzle blockage that requires a deeper manual flush.
Colour shifts between the screen preview and the final print are typically caused by mismatched ICC profiles or uncalibrated monitor settings. The wall printer software includes standard ICC profiles, and using them consistently eliminates most colour discrepancies. If the print appears washed out on a dark surface, check whether the white base layer was applied correctly. Without it, colours lose intensity on anything darker than a light grey wall.
For mechanical issues, the design of the wall printer provides easy access to all components. You can handle most repairs yourself with the included manual and video tutorials. Training and technical support cover everything from first-day orientation to advanced troubleshooting, and the technical team typically responds within minutes during working hours.
Creative Possibilities Beyond a Standard Mural
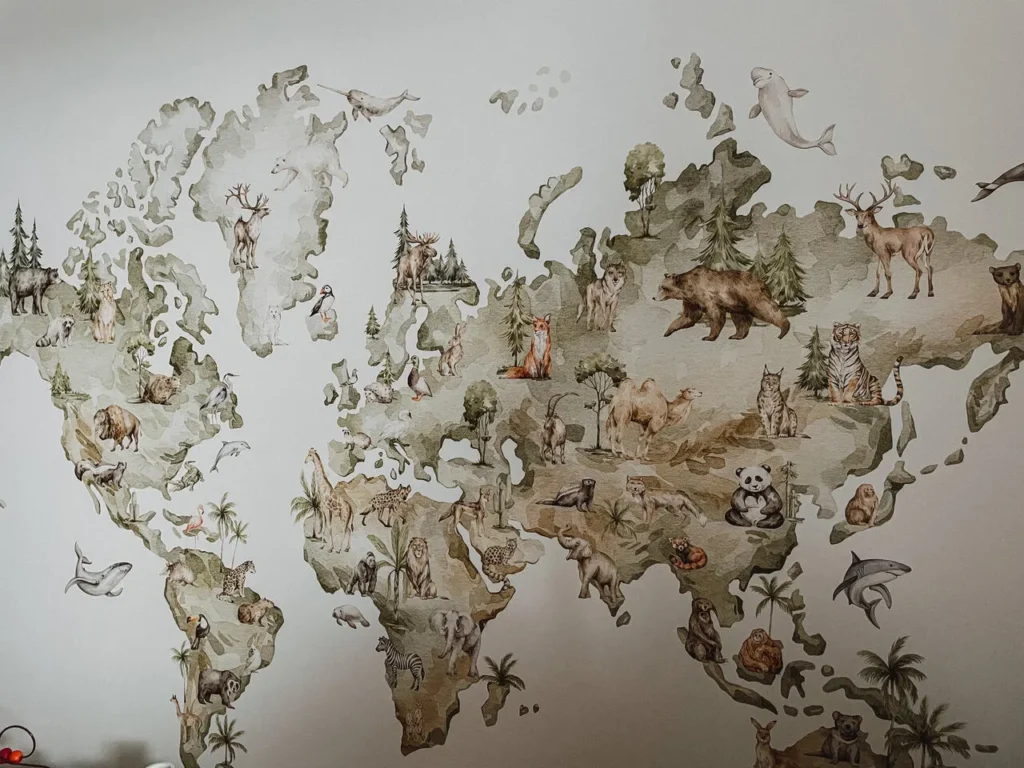
Once you know how to use a wall printer, the creative possibilities expand well beyond residential murals. A wall printer prints on virtually any vertical surface, making walls the canvas for signage, retail branding, event installations, and 3D wall printing effects that add depth to flat surfaces. The same device that prints a photographic landscape in a living room can produce corporate logos in an office lobby or themed graphics in a hotel corridor. You can customise every project to the client’s exact vision and create unique art using nothing more than a high-resolution file and a blank wall. Surfaces that would stop a wallpaper installer in their tracks are just another job for a wall printer. Post-processing is minimal: once the UV lamps cure the ink, the surface is ready to touch and use immediately.
With an additional configuration, the same wall printing machine also handles floor applications, doubling the range of projects you can take on. Whether you’re creating wall art for a private client or producing large-scale commercial installations, the process stays the same: position the machine, upload the design, and start printing.
The Business Opportunity Behind the Technology
A wall printing business built on this technology benefits from low material costs and a client base that’s growing while qualified operators remain relatively few. Every project listed in this guide is a revenue opportunity. Each one takes hours, not days. Each one requires one person and one machine. And each finished wall becomes your best marketing tool, because clients photograph the result and share it with exactly the people who might hire you next.
Wall printers⁺ combines advanced wall printing technology with hands-on training and technical support, so you’re never working alone. Explore what the wall printer⁺ pro can accomplish and take the first step toward building your own wall printing business.
FAQ – Frequently Asked Questions
Do I need technical experience to operate a wall printer?
No. The wall printer is designed to be user-friendly, with an intuitive control panel and step-by-step software. Every purchase includes stationary or remote training that guides you from first setup to daily operation, so you can start printing confidently even with zero prior experience.
What file formats does a wall printing machine accept?
PNG, JPG, and PDF. The control software handles scaling, colour management, and ink consumption calculation automatically. For the sharpest results, supply the largest and highest resolution version of the image available.
How do I know when the printhead needs replacing?
Typical signs include persistent banding, colour gaps that cleaning cycles no longer fix, or visible nozzle dropouts on test strips. With consistent maintenance, the Epson F1080 printhead delivers reliable performance for months of regular use.
Can a wall printer work on floors as well as walls?
Yes, with an additional configuration. The device is designed to print on any vertical surface, and by repositioning it horizontally the printing process remains the same. This opens up possibilities for branded floors, retail displays, and event installations.
What is 3D wall printing?
3D wall printing uses layered ink application to create a textured, raised effect on the surface. The result adds tactile depth to flat graphics, making designs appear three-dimensional. This technique works particularly well for logos, signage, and decorative accent walls.
What if the wall has an unusual texture or old paint?
Most textures work well, including rough brick, exposed concrete, and unfinished plaster. Old paint is fine as long as it isn’t peeling or flaking. Porous surfaces benefit from a sealing primer, and smooth materials like glass or metal require an adhesion promoter. If the surface is damaged or chalky, a quick repair and light sanding before printing ensures the best adhesion and sharpest detail.

