Guide
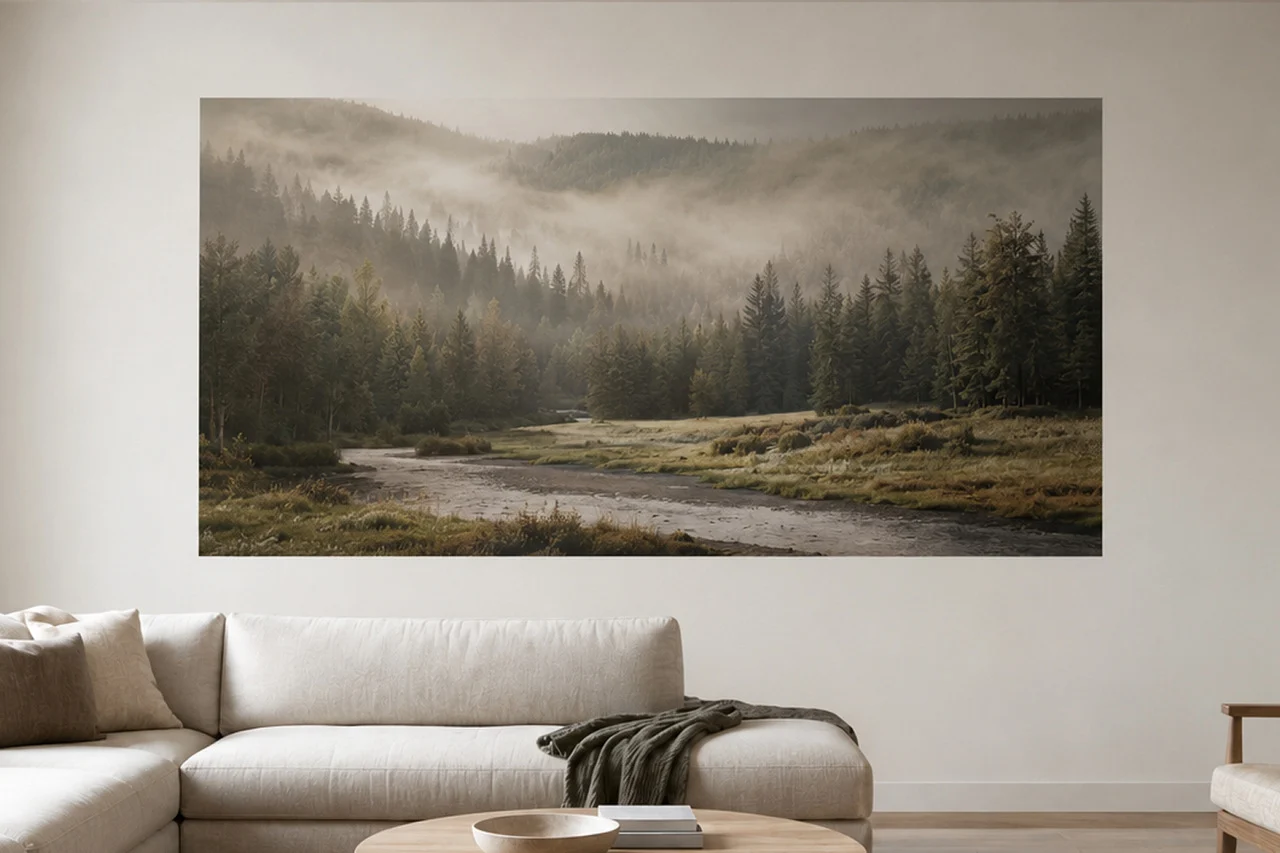
An image that is perfectly sharp on a computer screen may turn out blurry on a large wall. The reason? Too small file resolution. This is the most common mistake in the first orders. In this article, we will explain what DPI is and how it affects the quality of wall printing. We will show you how to quickly check file parameters on Windows and Mac, and then we will guide you through our DPI calculator. At the end, you will learn what to do when a graphic is too weak and how to rescue it.
What is DPI – meaning why does one file give a sharp image, and another visible pixels?
DPI (Dots Per Inch) is the density of dots per inch. Imagine a mosaic – the smaller the tiles you assemble it from, the more accurate and detailed image you see from a distance.
In wall printing, it works exactly the same way. DPI decides whether the client will see a pattern sharp as a razor on the wall, or noticeably composed of individual pixels – this is what will happen when this parameter is too low.
Why can a graphic that delights on a phone or laptop screen look terrible after being printed on a wall with a width of 3 meters? The screen shines with its own light and has a small surface area, which tricks our eye. When we stretch the same file to larger sizes on a wall, individual pixels become visible. The resolution of the graphic for printing on a wall must be matched to the format of the realization.
To make managing printing as easy as possible for you, we have prepared a DPI calculator that will do all the math for you (you will find the exact instructions and a link to the tool in the further part of the text).
How to check graphic resolution? Express instructions – to start working with the DPI calculator
Why check the file resolution at all? This is your safety fuse. Dimensions in pixels are necessary for our calculator – thanks to them, in a few seconds you will make sure whether the file is suitable for the wall before you waste your time, ink, and your nerves.
Here is how to extract this data in a few seconds.
In the Windows system:
- Right-click on the graphic file.
- Select Properties, and then go to the Details tab.
- In the “Image” section, you will find the dimensions (e.g., 4000 x 3000 pixels) and the DPI resolution.
In the macOS system (Mac):
- Click the file once and press the shortcut Cmd + I (Get Info). You will see the dimensions in pixels in the “More info” section.
- Alternatively: open the file in the default Preview program, click in the top menu Tools -> Show inspector. There you will find the exact dimensions and DPI.
How does our DPI calculator for wall printers work?
We prepared this tool specifically so that before every order you have the certainty that the final effect on the client’s wall will be satisfying.
Our DPI calculator works in three modes:
- Check quality. You enter the wall dimensions (e.g., 3 x 2 meters) and the file dimensions in pixels (which you just checked). The calculator immediately tells you whether the print quality will be great, acceptable, or unacceptable.
The calculator keeps track of proportions for you. It is enough that in the Planned print size section you provide the file resolution and one dimension – the second one will complete automatically.
- Maximum format. You have a great file from a client and want to know how large an image you can print from it, maintaining perfect sharpness? Enter the pixels, and the calculator will give you the maximum print dimensions in centimeters.
- Planning. You know that you have a wall of 4 x 2.5 meters to paint. You enter these data, choose the expected quality, and the calculator generates information for you on what minimum file resolution (in pixels) you need.
Go to the calculator and check any graphic file right now: DPI calculator wall printers⁺.
How much DPI do you really need? Test results – the same graphic, 6 different DPIs
How much DPI do I need for the print to be perfectly sharp? – this is one of the most common questions we get from you. Instead of repeating industry rules, we decided to check it. We did a test on a wall.
We printed two graphics (one without details, the other detailed) in different DPIs and evaluated their quality from several distances. Look at the effects!
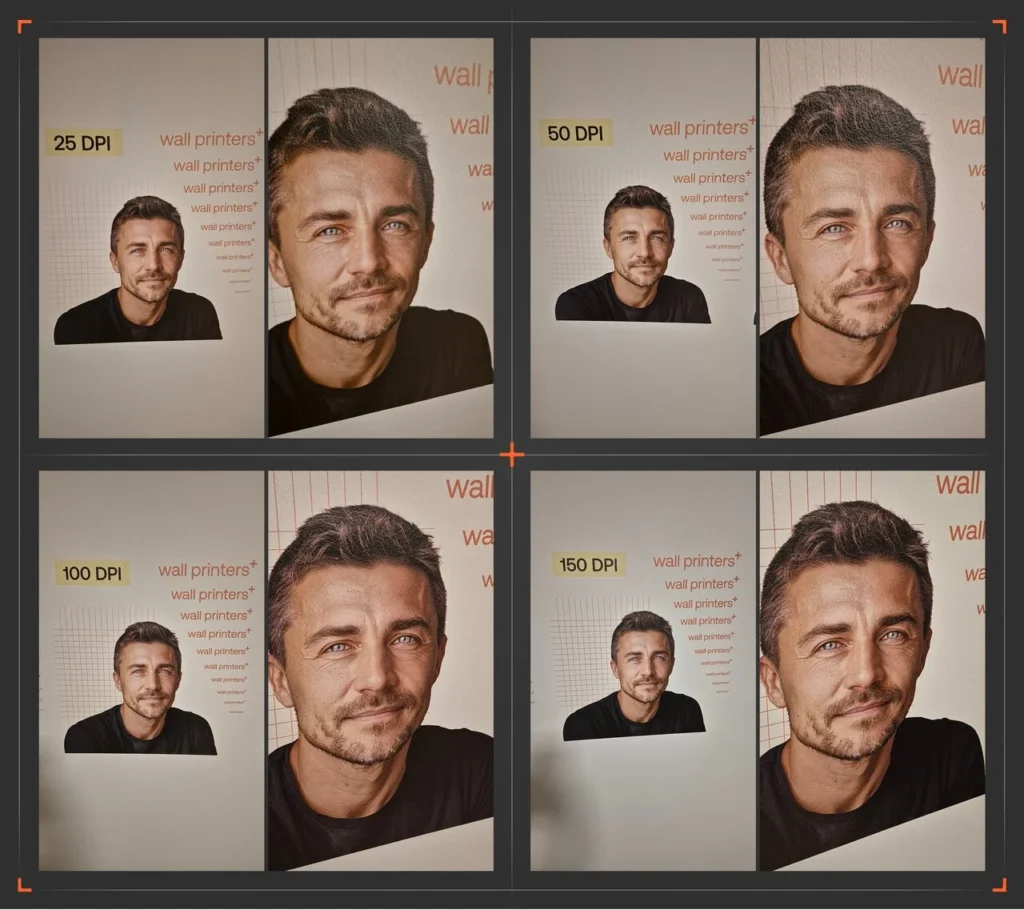
Here are the conclusions from our tests:
- Below 25 DPI – Unacceptable quality
● Graphic without details: Pixels will be clearly visible even from a distance of 5 meters. The file is not suitable for printing.
● Detailed graphic: Complete lack of readability. Small elements will be blurry, and you will notice pixels from 5 meters. Reject such a file. - 25 DPI – Only for viewing from afar
● Graphic without details: The effect is acceptable, but exclusively from a distance of over 3 meters. Get closer, and you will see pixels.
● Detailed graphic: All small elements are heavily pixelated and faded. Pixels are visible even from 3 meters. - 50 DPI – Satisfactory standard
● Graphic without details: From a distance of 1 meter, the image looks smooth. From a further perspective, the effect on the wall is fully satisfactory.
● Detailed graphic: From a distance of 1.5 meters, you can see pixels. Details (especially those below 2 cm in height) lose intensity. Above 1.5 meters, the effect is acceptable. - 72 DPI – Very good quality
● Graphic without details: Looks very smooth already from a distance of 50 cm.
● Detailed graphic: From a distance of 30 cm, delicate pixels are visible, and small details lose intensity. Above 50 cm from the wall, the effect is fully acceptable. - 100 DPI – Ideal quality (Premium)
● For both types of graphics: The effect is perfect. No visible pixels even when you stand 10 cm from the wall. - Above 100 DPI – Myth and unnecessary file weight And here we move on to the most important point: the repeated statement about 300 DPI as the best quality is an industry myth.
The visual effect on the wall at 150 or 300 DPI is practically the same as at 100 DPI. This applies to both detailed and irregular graphics.
Artificially increasing the resolution above 100 DPI makes no sense. The human eye will not catch the difference in quality (especially from a distance of over 1 meter), and you will unnecessarily clog the computer’s memory with a huge file and ripping will take longer.
Here is an organized summary of your test conclusions in the form of a readable table. I have divided the graphics into “without details” and “detailed” to make it easier to compare the effects for individual DPI values.
Print quality table depending on DPI:
| DPI Value | Quality rating | Graphic without details | Detailed graphic |
|---|---|---|---|
| Below 25 DPI | Unacceptable | Pixels visible from 5 meters, lack of details. File is not suitable for printing. | Complete lack of readability, small elements blurry. File to be rejected. |
| 25 DPI | Only from afar | Acceptable exclusively from a distance of over 3 meters. Up close, pixels are visible. | Small elements heavily pixelated and faded. Pixels visible from 3 meters. |
| 50 DPI | Satisfactory | From a distance of 1 meter, the image looks smooth. Gives a satisfactory effect on the wall. | From a distance of 1.5 meters, pixels are visible. Details < 2 cm lose intensity. Above 1.5 meters, the effect is OK. |
| 72 DPI | Very good | Looks smooth already from a distance of 50 cm. | From a distance of 30 cm, delicate pixels are visible, details lose intensity. Above 50 cm, the effect is acceptable. |
| 100 DPI | Perfect | Perfect effect for both types of graphics. No visible pixels even when viewed from a distance of 10 cm. | |
| Above 100 DPI | Myth / Unnecessary weight | The requirement of 300 DPI is an industry myth. Further increasing the resolution only unnecessarily increases the file weight. |
What to do when a graphic or photo from a client has poor quality? GIGAPIXEL AI pulls sharpness out of a poor file
A client sends a photo of huge emotional value, but small size. Or you have a beautiful graphic generated by AI, which looks great on the screen, but you checked in the calculator that when stretched onto a three-meter wall, it will turn into a smudge.
What then? Instead of looking for compromises or giving up on earnings, we simply boost the quality of this file using artificial intelligence.
In an ideal world, we always get files in the highest resolution. In reality, you must know how to deal with poor materials. The tool that rescues such situations is Topaz Gigapixel AI.
Why this tool in particular? Traditional graphic programs simply stretch existing pixels when enlarging. The effect? A blurry, unsharp image.
Gigapixel works completely differently. It uses artificial intelligence algorithms to draw in the missing information in the image. The program realistically analyzes the structure of the graphic. It understands where there should be a sharp line, and where a soft tonal transition.
GIGAPIXEL in practice – a few clicks to rescue the situation
The entire process is completed in a few simple steps:
- You drop the graphic into the program – just drag the file that, with standard DPI conversion, would be too small for your wall.
- You choose the multiplier – in the control panel on the right side, you decide how much you want to enlarge the image (available options are x2, x4, and even x6).
- You check the preview – on the screen, you see a direct comparison. On the left side, you have the jagged, unsharp original. On the right, the effect of AI action: sharpened details, cleaned noise, and perfectly smooth edges.
- You export the file – you click “Export”, and the program saves a new, significantly larger version of the file. A material prepared this way is ready to go to Photoshop for final technical processing.
Do you want to see how to do this step by step? You can find a detailed video tutorial, where we show this process on a computer screen, in our course How to earn from wall printing? (available in Standard and Premium packages or to be purchased separately).
No graphic knowledge? That’s no problem. Here is how we will help you ↓
Many entrepreneurs entering this business fear that a lack of graphic education will translate into errors, wasted ink, and customer complaints.
At wall printers⁺, we eliminate this risk completely through a comprehensive onboarding.
- On-site technical training ending with a Wall Printer Certificate. Our head of the technical department – Krzysiek – teaches you everything from scratch on the equipment you will be working with. We go, among other things, through the entire process of preparing files in graphic programs. You leave with a Wall Printer Certificate and self-confidence.
- Real-time technical support with a response time of <3 min. Standing in front of a wall at a client’s place and suddenly have a doubt? You drop a quick question on the dedicated Slack channel, and we answer in less than three minutes. Our technical department is on duty from 8:00 AM to 10:00 PM, 7 days a week. You get a specific instruction or a short video clip and keep going.
- Expert knowledge in your pocket. Instead of a boring manual, you get a knowledge base in your pocket – a handbook with links to instructional videos showing how to print on difficult surfaces (glass, metal, brick) and how to handle files.
Print without stress – you already have quality under control
The issue of DPI boils down to one rule: wall print quality starts with the file. Even the best machine on the market will not conjure sharp edges from a miniature image. But now you already have full knowledge, proven standards from our tests, and a free DPI calculator that protects you from any mishap at the client’s place.
This guide is just the beginning. Do you want to make your work even easier and completely get rid of stress regarding graphic issues? We have prepared for you a whole series of practical articles about graphics in wall printing.
Read article and find out how to prepare a graphic for wall printing step by step without using Photoshop.
And in case of questions – we are at your disposal.
FAQ – real questions from the wall printers⁺ community1. I don’t know much about graphics and computers. Will I manage to prepare files?
Yes, handling files for wall printing does not require a graphic education or knowledge of complicated programs. At wall printers⁺, you receive a full-day on-site training from scratch, a database of video tutorials, and access to a technical chat on Slack, where our experts answer questions in less than 3 minutes.
What DPI resolution is needed for wall printing?
For wall printing, 100 DPI is enough – this is excellent quality, at which pixels are invisible even from a distance of 10 cm from the wall. 72 DPI gives a very good effect, acceptable from a distance of over 50 cm, and 50 DPI is a satisfactory standard when viewed from a distance of over 1-1.5 meters. Below 25 DPI, the quality is unacceptable – pixels can be seen even from 5 meters.
Is 300 DPI needed for wall printing?
No. The requirement of 300 DPI is an industry myth repeated without testing in practice. Comparative tests by wall printers⁺ showed that the visual effect on the wall at 150 and 300 DPI is practically identical to that at 100 DPI.
What is DPI in printing?
DPI (Dots Per Inch), meaning the density of dots per inch, determines the resolution and the level of detail of a graphic in wall printing. A higher value of this parameter guarantees a sharp image without visible pixels, while low DPI results in blurred edges and loss of detail precision.
What to do when a file from a client has too low a resolution for wall printing?
A graphic that is too small can be enlarged without losing sharpness using an artificial intelligence-based tool, e.g., Topaz Gigapixel AI. Unlike simply stretching pixels in graphic programs, Gigapixel AI analyzes the structure of the image and generates the missing details, thanks to which the enlarged file (e.g., x2, x4, or x6) maintains sharp edges and does not lose quality.
Not sure if this business is for you? Want to know the details or get started right away?
Discover the collaboration opportunities available to you and learn how to get started—even if you lack capital, a business of your own, experience, or prior knowledge. We will teach you everything.
See more
Blog
Explore our resources
Have a look through our knowledge base. We’ve put together articles, videos and answers to the questions people ask most before getting into wall printing.
Our process
Discover our collaboration process
Take the first step and we’ll do the rest
Send the form and we’ll email you our price list straight away, with all the packages and what’s included. One of our advisers will be in touch within one working day. No hard sell, just answers to your questions.

Your data is safe
Step 1: Choose your location
Step 2: Fill out the form