


Are you worried that preparing a graphic for wall printing in Photoshop is complicated? Does opening the program make you feel slightly uneasy?
We have good news: preparing a file for a wall printer is a simple, repeatable process that takes no more than 10 minutes. In this guide, we will walk you through each step and show you that you can handle it—even if you have never used Photoshop before.
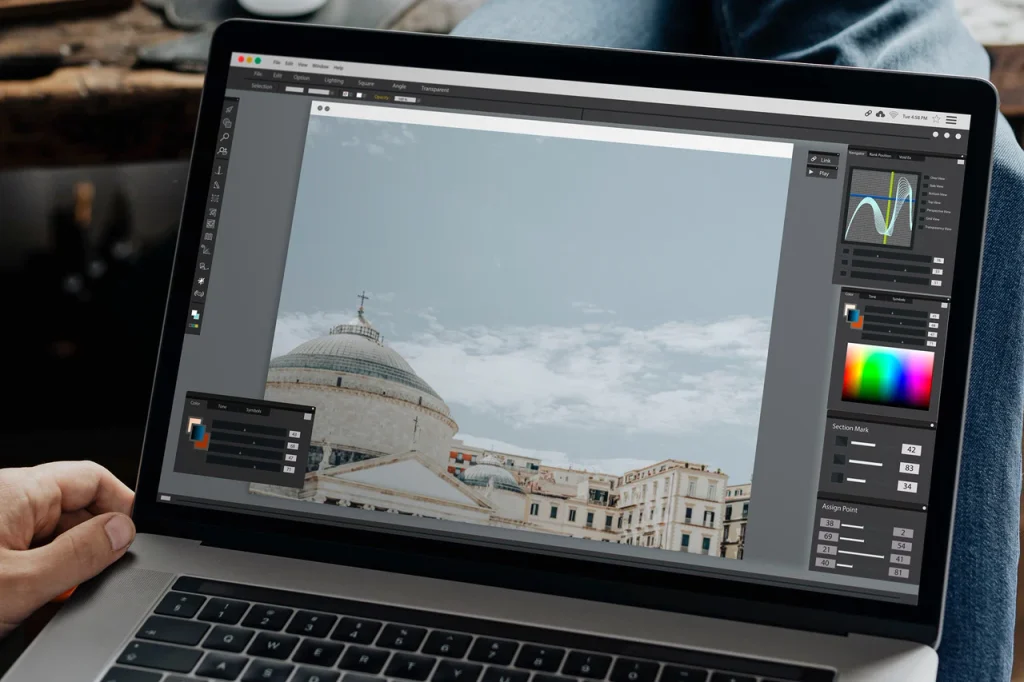
Why you do not need to be a graphic designer to run a wall printing business
First, let us clear up one important issue that causes stress for many beginners.
When you run a wall printing business, you do not have to design every project from scratch.
Where can you get graphics for wall printing?
- Your clients will often provide their own photos or designs.
- You can use ready-made graphics from stock libraries.
- For more complex projects, you can outsource the design to a freelance graphic designer.
As the operator, your main responsibility is to technically prepare the print file.
Read on and see how straightforward the process really is.
How to Prepare a Print File for Wall Printing in Photoshop: 5 Simple Steps
Let us go through the process we use every day at our wall tattoo™ service company—and teach during our in-person training.
There are five practical steps ahead.
Step 1: Crop the Graphic to Its Edges
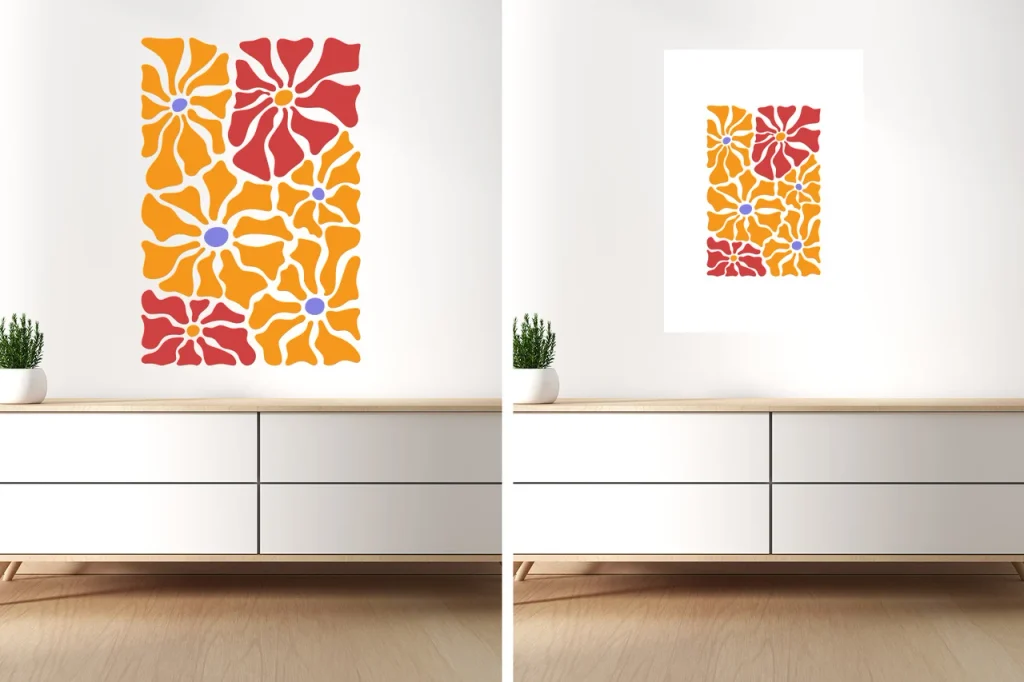
A wall printer treats empty white space around the graphic as part of the file dimensions. If you leave those margins in place, the final print on the wall will be smaller than planned.
The solution takes just a moment. The Trim Transparent Pixels function automatically detects the edges of your graphic and crops the canvas to match them.
One click and you are done – no need to outline the edges manually.
Step 2: Change the Color Mode to CMYK
As you may already know from our previous article, Which Specifications and Parameters Matter in Wall Printing? We Explain the Technical Terms, your monitor displays colors in RGB, while a printer mixes ink using CMYK.
Your file needs to contain color data in a format the printer can read.
In Photoshop, you can do this by selecting:
Image → Mode → CMYK Color
That is it.
Step 3: Apply the Coated FOGRA 39 Color Profile
The CMYK color mode alone does not tell the printer exactly how the colors should look.
This is where the Coated FOGRA 39 profile comes in. Think of it as a translation guide that tells the machine how to mix the ink droplets so the colors on the wall are as close as possible to what you see on the screen.
To apply the profile, select:
Edit → Convert to Profile
Then choose Coated FOGRA 39 from the list and confirm.
After a moment, your file will have the correct color settings for printing.
Step 4: Adjust Brightness and Contrast
Now it is time for the second-to-last step.
An image on a monitor will always look brighter and more saturated than the final print. A matte wall absorbs some of the color and contrast.

That is why Krzysiek, head of the technical department at wall printers⁺, recommends slightly increasing the brightness and contrast before printing.
Use the following tool:
Image → Adjustments → Brightness/Contrast
This gives you full control over the final appearance of the graphic.
Step 5: Save the File as a TIFF
Finally, save the file in TIFF format with LZW compression.
TIFF is a lossless format that preserves the quality of the graphic. LZW compression reduces the file size without reducing image quality.
When naming the file, avoid Polish characters and other special characters.
For example, use:
zolty_mural.tif
instead of:
żółty_mural.tif
Your print file is now ready.
The Five Steps at a Glance
| Step | Action in Photoshop | Menu path | Why it matters |
|---|---|---|---|
| 1. Cropping | Remove empty margins | Image → Trim Transparent Pixels | Ensures the graphic prints at the correct size |
| 2. Color mode | Change the file to CMYK | Image → Mode → CMYK Color | The printer reads CMYK color data |
| 3. Color profile | Apply Coated FOGRA 39 | Edit → Convert to Profile → Coated FOGRA 39 | Helps the printed colors match the design |
| 4. Correction | Increase brightness and contrast | Image → Adjustments → Brightness/Contrast | Walls absorb some brightness and contrast |
| 5. Export | Save as TIFF with LZW compression | File → Save As | Preserves quality and supports color profiles |
How to Prepare a White Underbase for Wall Printing
Printing on a white wall is the easiest scenario. The wall already provides a bright background, so the five steps above are usually enough.
But what happens when your client wants to print on a dark wall—for example, navy blue, dark gray or black?
If you print directly onto a dark surface, the colors will appear muted and less vibrant.
The solution is a white underbase: a layer of white ink applied first, followed by the colored graphic.
Although this may sound complicated, in Photoshop it only requires three additional actions.
- Select the pixels that make up your graphic using Select Pixels in the Layers panel.
- Contract the selection by 5 pixels using Select → Modify → Contract. This helps prevent a visible white outline around the design.
- Create a new spot color channel in the Channels panel and name it according to your printer software:
- I1 for MainTop
- Spot_1 for FlexiPrint
That is all.
The red mask you see on the screen after completing these steps is an instruction for the printer: apply white ink here first.
Why You Are Not Left on Your Own with wall printers⁺
Getting comfortable with this process takes only a little practice.
And if you have any questions along the way, you receive full support as a member of the wall printers⁺ community.
- Practical, In-Person Training in Szczecin. We teach the entire process from scratch during a full-day, hands-on training session led by the head of our technical department.
You will learn how to prepare print files and operate the printer in real-world scenarios. - Technical Support in Less Than 3 Minutes. If you are at a client’s site, preparing a file and unsure what to do, message us through the community Slack channel.
Our technical team responds in under 3 minutes on average and is available from 8:00 a.m. to 10:00 p.m., seven days a week. - Expert Knowledge at Your Fingertips. You also receive an interactive PDF handbook with direct links to short video tutorials, as well as ready-to-use checklists.
You can keep everything on your phone and access it whenever you need it.
Summary: Is Preparing a Graphic for Wall Printing Difficult?
Preparing a graphic for wall printing is a clear, repeatable process.
You do not need to be a graphic designer or know every Photoshop function to run a successful wall printing business.
You only need to follow a few specific steps:
- Crop the graphic.
- Change the color mode to CMYK.
- Apply the Coated FOGRA 39 profile.
- Adjust the brightness and contrast.
- Save the file as a TIFF.
As you can see, there is no magic involved. A few steps and a few minutes are enough to get your print file ready.
Would you like to find uut whether wall printing is the right business for you?
Fill out the short form below and let’s talk.
We will answer your questions, clear up any doubts and help you decide how to get started.
FAQ
Do I need to know Photoshop well to make money with wall printing?
No.
Preparing a file for wall printing is a repeatable, technical process that involves just a few specific steps.
You will learn the complete workflow and all the necessary Photoshop functions from scratch during our one-day, in-person training.
Do I need to know how to design graphics from scratch?
No.
You do not have to be an artist or a graphic designer to run a wall printing business.
Clients often provide their own photos and designs. You can also use ready-made stock graphics or outsource more complex projects to freelance designers.
Your role is to technically prepare the file before printing. With the right process, this usually takes around five minutes.
What is the best format for saving a wall printing file?
TIFF is the best format for saving wall printing files.
It is lossless and preserves color profiles as well as special channels used for the white underbase.
When saving the file, choose LZW compression. This reduces the file size without affecting image quality.
What is the Coated FOGRA 39 color profile and why does it matter?
Coated FOGRA 39 is a standard CMYK color profile used in the printing industry.
It helps ensure that the colors printed on the wall are as close as possible to the colors displayed on your computer screen.
Applying the profile in Photoshop reduces the risk of the printer interpreting the colors incorrectly.
Why should I increase the brightness and contrast before printing?
An image on a monitor always appears brighter than the final print.
A wall—especially a matte wall—absorbs some of the light and color. Slightly increasing the brightness and contrast in Photoshop helps the finished print look clearer and more vibrant.

